From 1st Tadcaster Troop in the UK.
|
|
Rubber Band Hovercraft |
The Rubber Band Powered Hovercraft is properly described, with good illustrations by Doug Mountford, in the Scouting Magazine supplement called "Pipeline", December 1980 -- a time when hovercraft were probably at their peak. All credit should go to the original author who might be David Williams or Martin Relf or Michael Colwell. Thanks guys.
The base of the hovercraft is a standard polystyrene ceiling tile. (Also "all the rage" in 1980 :-) ). Buy at B&Q ( or choose your own superior supplier).
You need a roll of gaffer tape. Also buy at B&Q.
Buy rubber bands and a small propeller from a model shop. About £1 for the propeller and £1 for a packet of 20cm rubber bands.
Find, or buy, strong wood about 2cms by 0.5 cms and cut into lengths about 20 cms long. Balsa wood might work but we haven't tried it. We used that wood you can buy in B&Q for edging - quite expensive for what it is.
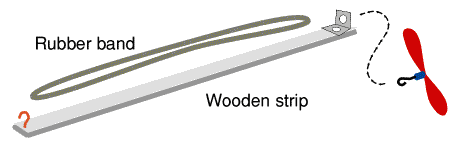
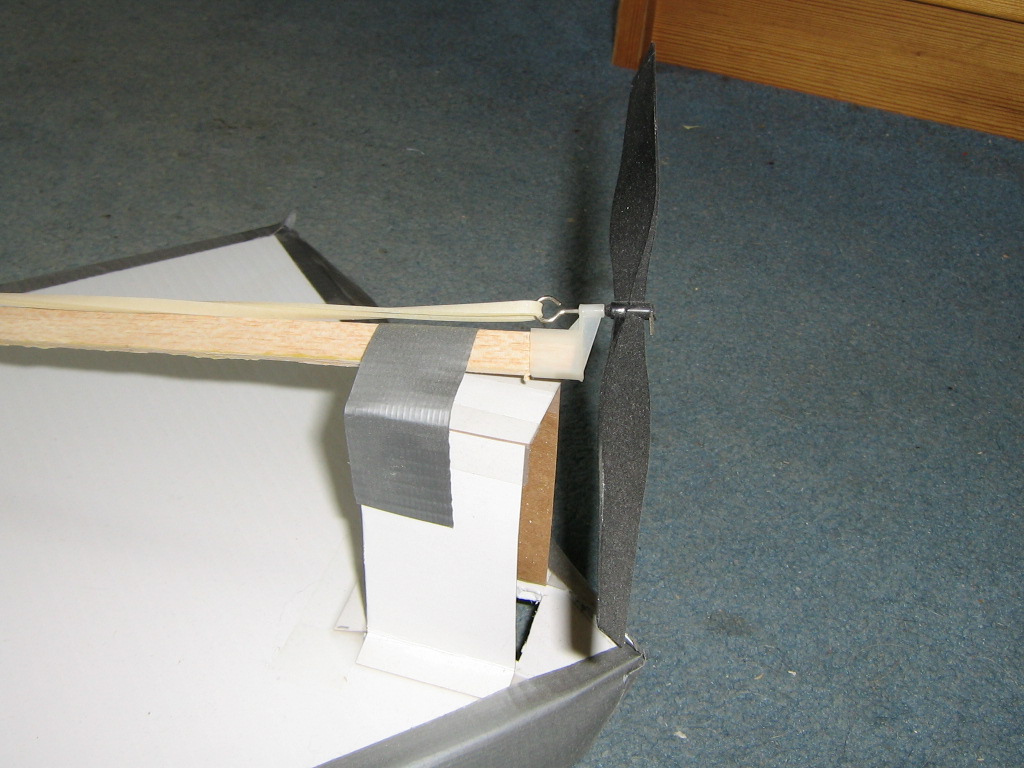
Find, buy or make some small metal angle brackets to fit the propellor mounting. We bought some small metal flat bars with four holes at B&Q. Saw these in half and bend each half to a right angle, one hole on each side of the angle. (An adult should probably do this prior to the meeting.)
You also need a small brass screw hook.
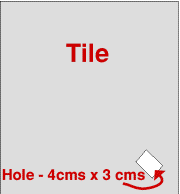
Using a craft knife, carefully cut a hole 3cms wide by 4 cms long near the corner of the tile.
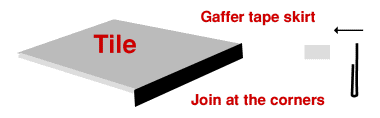
Build a skirt around the tile. The article suggests using polythene. We tried that but it didn't work well so we improvised with gaffer tape. Fold the tape over on itself so about one quarter of the tape is left sticky. Use this to stick the tape along the edges of the tile. The bottom of the tape should be as flat as possible.
Screw the angle bracket on to one end of the wood and the hook at the other end. Fit the propellor wire through the hole in the angle bracket. Attach the rubber band between the propellor wire and the hook. It should fit loosely between hook and wire.
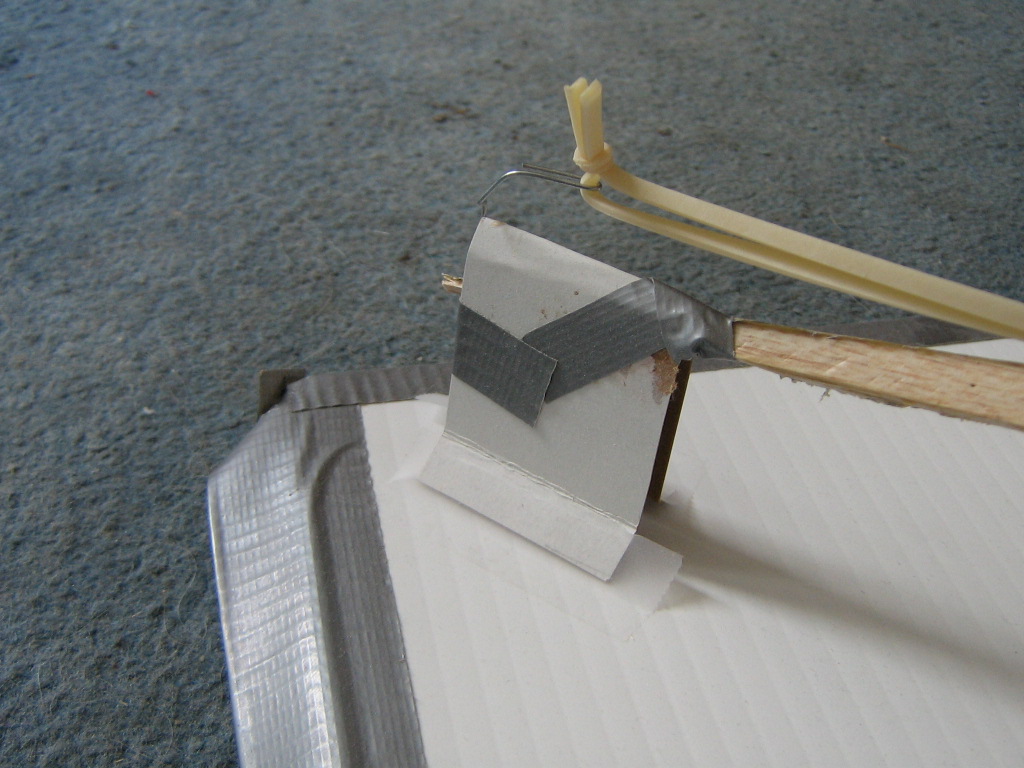
Using stiff cardboard, make a scoop to fit over the hole you made in the tile. Make sure the scoop is high enough so that the propellor does not touch the tile when it spins. Also make a cardboard fin for the rear of the craft.

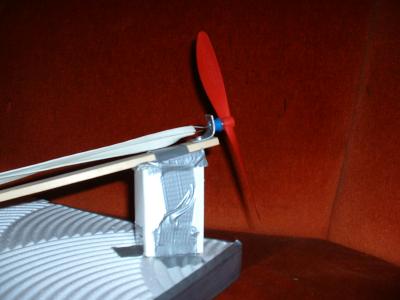
Detail of the scoop and propeller
mounting
Use gaffer tape, as little a possible, to :
You should now be ready for a test flight.
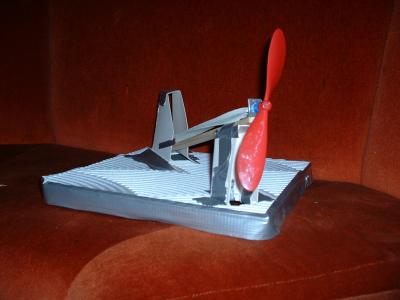
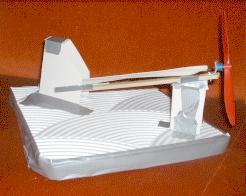
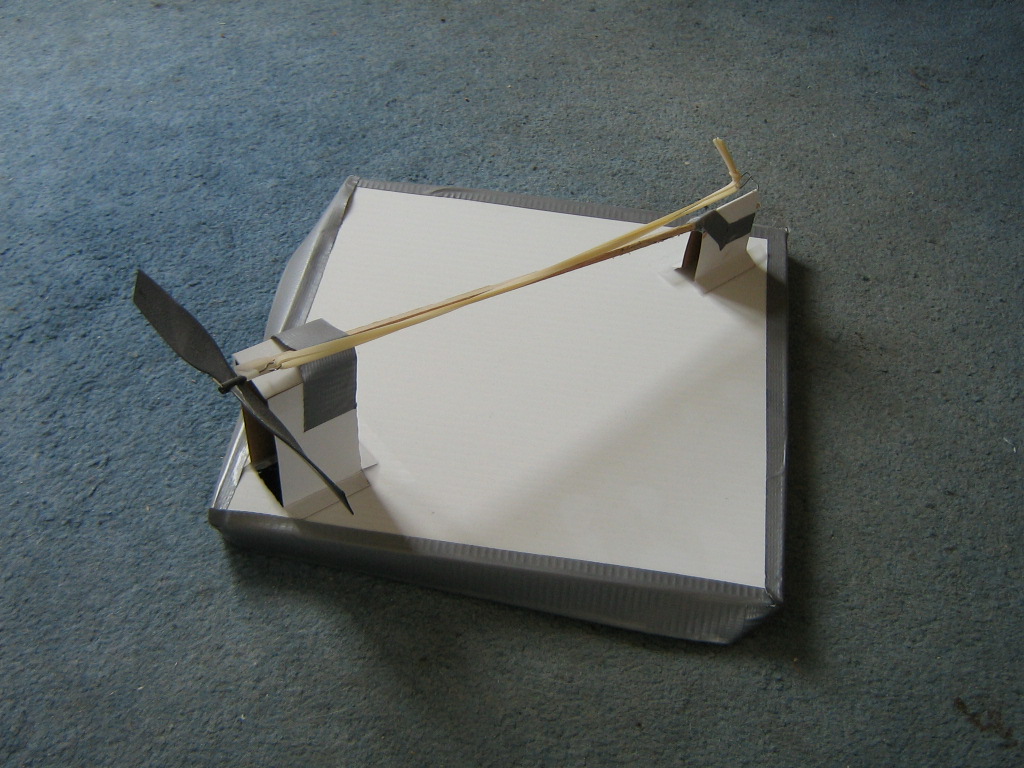
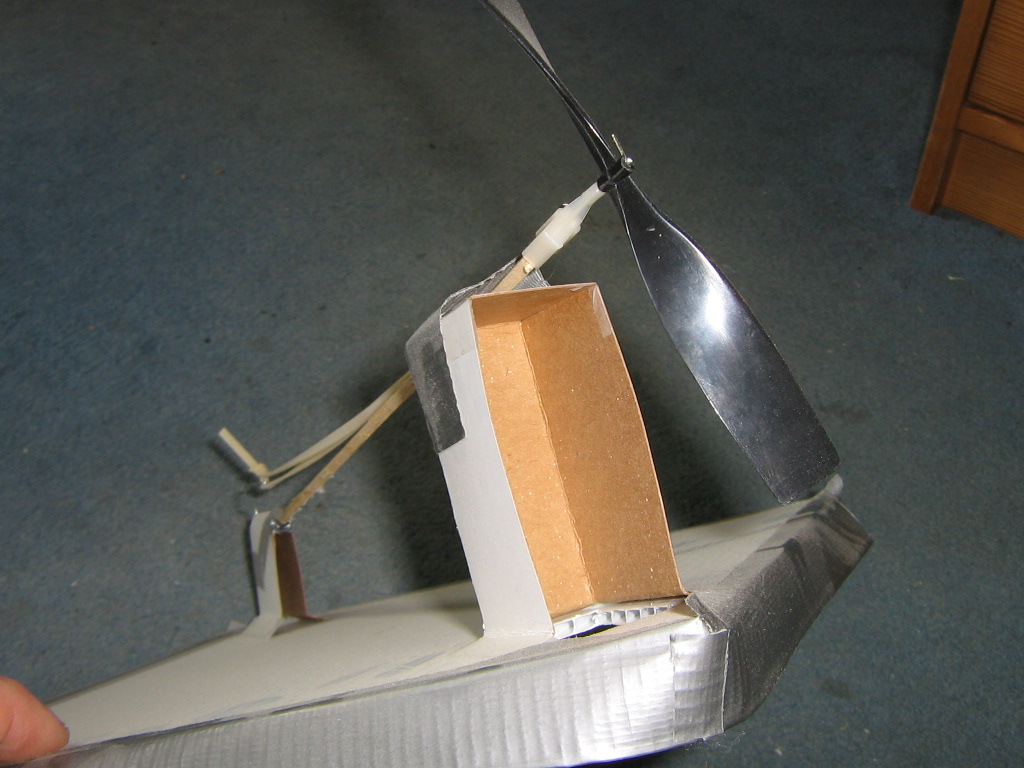
The completed hovercraft, though in this example the tail fin is of
a non-standard design.
SAFETY WARNING.
You wind up the rubber band by turning the propeller clockwise. When you do this there is a risk that you will let go of the propellor and it will give you as nasty whack on the fingers, possibly cutting you, resulting in blood, tears etc.. If you want to avoid this then you must wear thick gloves or find some alternative way of winding the propeller up.
OK, if you have read, understood the safety warning and accept the risk of injury, ...
Wind the propellor up (you will need at least 40 turns). Hold the propellor firmly. Place the hovercraft on the floor and let go of the propellor and the hovercraft at the same time.
Direction should be controlled by bending the cardboard fin - you will be surprised at how effective it is. If the hovercraft stalls, try adjusting the balance with small pieces of Blutack. To achieve maximum performance put a few drops of oil on the propeller mounting. Long flights require a smooth floor and plenty of power.
RECOMMENDATION. A leader or some other interested person should try making and flying one first so that the scouts can see what a working hovercraft should look like. It also gives the leader an opportunity for risk assessment. Good luck.
We created a version of this using Coraplast (coragated plastic used for signs). It didn't lift off the ground very well, but we haven't taken a lot of time yet working on the issue. Possibly, the skirt isn't accurate enough.
| 
| 
|

| 
| 
|